Billing terms
When creating an invioce, you need to create one or more set of billing terms.
Choose the option “Billing terms editor” from the “Business” menu.
In the dialog “Terms” you click “New” after which you are presented the dialog “New Billing Term”.
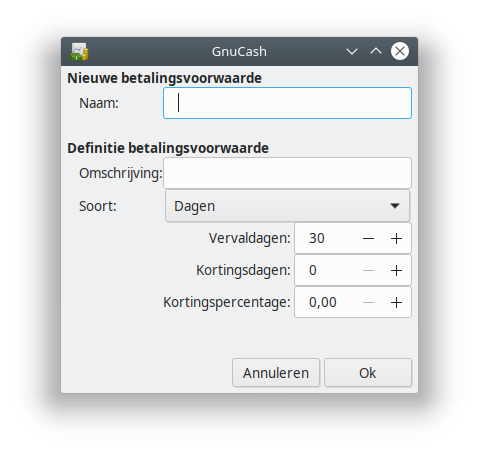
You fill in the following:
- Name: The name of the billing term
- Description: A description that will be on the invoice, such as “Please pay within 30 days via bank specifying the customer number and invoice number”.
- Type: In most cases you will choose “Days” here.
- Due Days: The number of days after which the invoice is declared expired. If you choose for 30 days and create an invoice with as date the 1st of May, the invoice will be indicated as expired on May 31st. If the invoice has not been paid before May 31st, the invoice will be visible as expired and unpaid in the report “Invoices Due Reminder”. You can read more about this at Report Invoices Due Reminder. Determining the expiration limit can be complex. Use a period that is custom in your branche, but make sure you won’t run into payment difficulties because of too roomy time limits.
- Discount Days: This is optional and you don’t have to use it. You can use it, if you want to offer your customer a discount if they pay within a certain number of days. Keep in mind that this might hurt your profitibility.
- Discount %: This field is linked to the “Discount Days” field and is therefore optional as well. It is the discount percentage given to customers paying within the specified number of days.
You can create as many terms as you want.
Click OK to save the billing term. Click on “New” to create another billing term, or on “Close” if you are done.
You can now assign customers a default billing term by editing the customer and select a billing term on the tab Billing Information. You can also decide per invoice what term to use.
You are now ready to Create a new invoice.